Thursday, October 27, 2022

ORPG HANDBUILDING - FALL 2022 - General Outline for the Six Weeks


                                                                  Layering of Glazes


Waiting for the loading and firing
Glazed Class Projects
Preparing Samples: Based on one clear cone 6 base (Oxides: Cobalt, Chrome, Red Iron Oxide, Copper Carbonate, Rutile).

Colour Blends

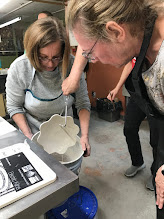
Pouring
Dipping

Final Glaze Firing 
T
he class used several strategies for the final surface treatments of their projects. Some used the bright colours of underglazes along with a clear glaze. Others opted for the glazes available at the guild. Finally, some used commercial glazes. It really depended on their sensibilities and trying to materialize what is seen and felt by the maker.


Bisqued Plates and pots using transfer printing


Strategies for coil building
Week 6: Glaze Firing

Discussion: Firing  (electric, wood, atmospheric) and its effects. A PDF will be sent out on this.
Coil sculpture continued.
Everything but the coil project should be dry enough for firing. 

 In preparation for a glaze firing, you will be glazing some works in class. I have already bisqued many of your pieces so don't panic.
* We will be mainly using the clear glaze. This will be applied over your bisqued pieces by the pouring method.
* Other colours in the guild's glaze collection may also be used.
* Whatever is not finished for a glaze tonight, arrangements will have to be made with me for an extra session. 
* Some of you were asking about membership last week and this is the person to contact: Donna Schenher  - donna.schenher@gmail.com or check the website OldmanRiverPottersGuild@gmail.com

* There will likely be another Handbuilding class starting around mid-February, so you may continue some work at this time. Let me know so that your name can go on a list for first announcements.


Week 5: Simple Glazing and Sealing
Discussion
pdf has been sent out entitled "Glaze Info". We will be going through glaze theory that Thursday, Nov.3, 2022.
- key parts of a glaze
- decontructing glossy and matte; proportional relationships of silica to alumina
- colour additives: traditional oxides and Mason Stains
- what are encapsulated pigments
- a brief historical background to sealing clay (watertight to dishwasher safe).

Continue working on projects. 
Project: Transfer printed Plates - trim and add lip/feet - finish to dry.
New work: Start a coil sculpture/vessel on three legs (Candlabra or Tree of Life) - start by extruding coils and make a 3 part base lke a clover leaf.


Week 4: Transfer Printing onto a roundish/squarish plate (we are using Hump molds)

Above: Transfer Painting on Newsprint

Discussion: Draw out a simple design in the shape of your plate
Preparing the transfer: Using newsprint we will paint our design, cover it with slip and transfer this to the plate.
Technical: We will make coils on the extruder. These are added for a finer edge on plates. We will also use a coil to form a a foot on project 3 if its not too dry.
Drying: Tight wrap to looser wrap in week 2/3 - works from week 1 & 2 should be dry enough for firing (bisque fire).

White Slip for Transfer Process
Slips are very versatile and can be fired at almost any temperature. I am posting a few here that are very versatile:

All Purpose White Slip (Jason B Burnett, Pottery Mking, 2022 Sept/Oct.) Cone 04-10

Ferro Frit 3124  19.2%
EPK Kaolin  27%
OM4 Ball Clay  27%
Silica  21.$%
Zircopax  5.4%
= 100%
________
Add Mason stains up to 10%

Base Slip (Sunshine Cobb, Handbldg.)Cone 04-9

Kaolin  34%
Ball Clay  20%
Potash Feldspar 27%
Flint  19%
= 100%

   Zircopax  8%
Soda Ash  0.25%
Sodium Silicate  0.25%
Add Mason stains up to 10%

White Base Slip
(Robin Hopper, in Ceramic Spectrum) cone 04-12
Ball clay 75%
Kaolin 10%
Silica 10%
Feldspar 5%
=100%

(at cone 2 or lower it may cause the glaze to craze). 
Add Mason stains up to 10%


Week 3: Decorated Container - Moving Towards Complex Forms


Discussion: Using Darts to Alter the Form
A simple template design is given curves and movement through darting.Thinking of Surface Decoration from the start by impressing the surface with stamps, rollers, textyre plates. Adding textured cutout shapes over the base plane.
Technical: Demo on the slab roller usage.
Drying: Tight wrap to looser wrap in week 2/3.


Week 2: Tulippiere (Flower Vase) - Moving Towards Complex Forms


    Project: Tulippiere - Five Part Form


Discussion: Putting together multiple templates
The template as a deconstruction of various circles.
Our tulippiere: base, mug body (shortened a bit), shoulder, lip 
Thinking of Surface Decoration from the start: texturing of some parts before cutting of template, addition of spheres, slip dots and underglaze. Subtracting circles (using circular cutters) or geometric shapes.
Drying: Tight wrap to looser wrap in week 2/3

Week 1: Introduction
Week 1: Making a Mug 

Discussion: The Template
Where can we source a mug template and what is it based on?
Making Handles
Preparing the Clay - pounding, rolling, compressing & smoothing the surface
Clay readiness: soft slab and hard slab
Preparing for bisque firing: finishing details, cleaning surface, applying 3 Underglaze colours
Drying: Tight wrap to looser wrap in week 2/3


Tuesday, July 12, 2022

Handbuilding at ORPG - Week 6 - Early Glaze History

 June 30, 2022

This week we will spend time completing our surface decoration. This is in two parts:

a) complete painting with underglazes (commercial or coloured slips).
b) applying dipping glazes to bisqueware or apply commercial glazes (gloss, satin, matte)

The pictures below are taken from Chinese glaze history. I include these because there are important parallels to what we are doing or that I have referred to:

  
Above: Neolithic Terra cotta
(bottom left is Minoan)

 Left:  terra cotta, Tang Dyn.,
lead glaze (3 colours - Sancai)
   Right Above: terra cotta,
                                                   Qin & Han Dyn. 231 BC-220AD, lead glaze


Low fire glazing (see pictures above)
The Chinese used this approach on terra cotta. This clay would fire between 700-900F (wood fired to cone 06, 05). They developed a lead based clear glazed and applied this over coloured surfaces (minerals). We begin to see this glaze in the small figurines of the Han Dynasty.


High Firing - Stoneware and glazing

Sturdy stoneware glazing requires a hotter wood firing; gradually the kilns became longer and moved up on an incline. This reached cone 6 in proto celadon works and cone eventually cone 10/11. The firing often lasted two weeks and many in the village participated.

High Firing Porcelain
At the same time new clay materials were being experimented with such as porcelain (addition of white kaolin) and refinements in making a smooth clay body.


Top Left: Proto celadons (Proto Porcelain 1046BC-256BC)
Top Right: More refined celadons (550-577AD)


Celadon on Stone ware. This is a feldspathic glaze. Ash would also contributed to glossy surface. Reduction fired. c.581-618 AD.


Early porcelain. Petal design, Guan Kiln, Tang Dynasty 618-907AD


White glaze porcelain. Pillows popular from Sui Dynasty 581AD-Yuan Dynasty 1368


Tuesday, June 21, 2022

Handbuilding at ORPG
Week 5: Surface Decoration 

Thursday, June 23, 2022


Demonstration
This is intended to show you a few basic strategies for treating your surfaces at the bone dry and leather hard stages. The pieces would then get bisqued and a more layers of colour will come in the form of glazes.

We will do four techniques on four small test plates:

Plate 1 (plain surface/no texture): Mishima
   - first layer: several random colour of underglaze, dilute a bit with water to make brushable
   - second layer cover with wax
   - third layer, after about 15 minutes and wax has dried draw out a design with your pin tool
   - fourth layer, apply black underglaze over design (work in well).
   - fifth step, with clean sponge wash away black, keep sponge clean at each sweep

Plate 2 (plain surface/no texture): Sgrafitto (means 'mark making')
   - look at Marcy Neiditz's work. Divide the plate into 2-3 areas.
   - cover the plate with 3-4 coats of underglaze colour (3 areas = 3 colours), allow for drying between
     applications.
   - make a design with pencil (at a loss? think of Zentangle doodles). The inside areas should be filled
      with linear motifs like lines, circles, bean shapes etc. See pictures entitled sgrafitto samples.

Plate 3 (textured plate already prepared): Creating a Vintage look
   - apply one coat of black underglaze and allow to dry (it becomes matte).
   - With a clean sponge and a large bucket of clean water, start to wipe away the black. Keep the sponge
      clean and damp not wet. Aim to clear away the high points.

Background on Painting with Underglazes
Underglazes are slips (clay/water) made of clay and a colorant. Commercial underglazes might have the odd chemical addition for better brushability. 

This approach to colouring the surface is ancient. We see this with the Greeks, in Mesopotamia (Iran) and China. It is first seen in geometric linear designs and evolved into larger colour areas. The colorants were minerals and the basic colour palette included the following:
Red - red ochre
Yellow - yellow ochre
Black - manganese
Blue - cobalt
Green - Copper


Contemporary Underglazes
 
At the time of the Minoans and Greeks coloured slips were composed of fine particles of clay with water. The recipe for this is found with articles on Terra Sigillata. The finest particles of clay were used, a colourant was added and finally the piece was buffed. This approach was found in Minoan and Greek works.

Today additional ingredients are added to the basic mix. In part because we fire hotter and our clays are more complex than terra cotta. Here is a typical Underglaze recipe:
 
Janet DeBoos White slip
Custer Feldspar 25%
Silica 25%
EPKaolin 24%
OM4 Ball Clay 24%
Bentonite 2%

For Blue:
Custer Feldspar 25%
Silica 25%
EPKaolin 24%
OM4 Ball Clay 24%
Bentonite 2%
______
add
Cobalt Carbonate 2.5%

For Black
Custer Feldspar 25%
Silica 25%
EPKaolin 24%
OM4 Ball Clay 24%
Bentonite 2%
______
add Mason Stain Black 6600  8%

Experiment with:
Copper Carbonate for  Green at 2.5%
Chrome for green at 1.5%
Red Iron Oxide at 3-4%


Thursday, May 26, 2022

Handbuilding Class - June 16, 2022 -


 Hello Everyone,

It is not always easy or desirable to take notes in class so I am posting here the key theoretical information that we talk about in class.

Thursday, June 16, 2022
Bisque Stamps

Our stamps have now been fired. There are usually two firing in clay work, the bisque and the glaze firing. The bisque is usually lower in the range of 1830-1955 degrees F (999- 1085 degrees C). 

As the kiln fires up to these temperatures there are some important markers:
100 degrees: boiling point, steam is forming inside clay. If this goes too fast there may be an explosion
300-400degrees: all water in clay turns to steam
573-625degrees: Quartz Inversion - the molecules of clay are expanding. It is important to go slow in this segment.
700-1000degrees: the organic material in the clay burns out and form the gas Sulphur Dioxide. If the gas can't escape it will cause bloating and pinholing.

Vessels That Contain Liquids - Pitchers


Human ingenuity is certainly evident in all the variations of form we see for this type of container. They had/have many functions from ritual libations, to wine containers, to domestic water carriers etc. Animals also figure prominantly as a form giver in earlier cultures. The human head appears some African containers.

Consider in the Pitcher: the body, spout, handle and feet. Also try to anticipate the surface texture or articulation.


Handbuilding at Old Man River Potters Guild
Spring, 2022 (May 26 - June 30)
Current Web Portfolio: louisemcormier.weebly.com


Its been a while since I have done Blogging - bear with me!! If you go to the previous post (youg lady working in clay) and press on the picture, you will see what the class was up to last term. They did some awesome work.

Below is an overview of the term so that you know where you are headed:

May 26 2022 – Class Outline & Goals
                                                     

Six Week Schedule

1. Project 1: Coil Making (Interlacing with support structure)
2. Complete Project 1 – finishing details – Feet and Handles, stamps
3. Project 2: Rolling a Slab for Hump Molds, Drop Molds and Templates
4. Complete Project 2 – finishing details. Prepare Push plates for following week
5. Surface Decoration: textures, additions, slips and underglazes
6. Surface Decoration Continued + Overview of Glazes and Firings

Basic Methods of Form Making
Pinch
Coil
Slab

Basic Painting Methods of Surface Treatments
Underglaze painting & stains, transfers, glazes (glossy, satin, matte), overglaze, decals

Form Helping Tools
Hump Mold
Drop Molds
Template Paper (cardboard & black roofing Tar paper)

Key Concepts
Lesson 1: greenware, wedging, compression, scoring, function/aesthetics (what makes a good basket), air bubbles, warping
Lesson 2: leather-hard clay, bone dry clay, texture, weight/proportion
Lesson 3-4: soft slab, hard slab, bisque mold, plaster mold, template vs stencil
Lesson 5: sgraffito, paper resist, wax resist, tape, shellac, sprayers and slip trailers underglaze vs glaze (glass + stabilizer+ melters/flux).
Lesson 6: cone firing, bisque firing, glaze firing, glaze fired, vitreous (food safe)